Wednesday, February 29, 2012

You're Welcome


Rachel here.

Do you see that picture? Do you know what it's of?

IT'S HOMEMADE SNICKERS BARS.

And now that you've put that all together, you understand the need for all caps. I mean, come ON. Had you ever even imagined that such a wonder existed in the world? I say this as someone who has witnessed the miracle of birth relatively recently, too. And yes, I'm putting the bars and the baby on the same spectrum of holy-crap awesomeness.

This is how I came to have the amazing good fortune of snapping the above shot. I was on Pinterest (yes, yes, I may need a pintervention...) when suddenly, before my eyes, a vision appeared. I rubbed them to make sure it wasn't a mirage. Could it really be? Could Snickers bars be made at HOME? As regular readers know, I'm a pretty staunch believer that most things can be made better by our own two hands than whatever crazy factory processes are capable of behind closed doors. In other words, there was no way that a homemade Snickers wouldn't be better than it's store-bought counterpart.

And then I figured out a way to make them even better...have my MA make them instead of me! So I quickly emailed the link with a note saying something like, "It's so sweet of you to fly us all out for a visit, but I'll know you truly love me if you make these for me." And, because she really DOES love me, she did. On Friday. And I have eaten two a day since, because two homemade Snickers a day keeps...oh, who needs a reason.

The lovely lady who generated this recipe writes over here at How Sweet It Is. Her name is Jessica, and it's totally fair to say that her homemade Snickers bars are a gateway drug into the awesome realm of her beautiful blog. Seriously--after sending my ma the recipe I spent the rest of Maxine's nap perusing Jessica's recipe files, chuckling out loud and bookmarking future culinary endeavors.

Click here for the recipe. Our friendship will suffer if you don't.

Monday, February 27, 2012

Vegan Artichoke Dip


Exciting doings here at LTIR central: Rachel and I are actually cooking together because she is visiting the East Coast. Last night we whipped up this tasty dip inspired by a recipe from Blissful Bites by Christy Morgan (a cookbook we highly recommend).

Despite Rachel freaking out just a little because I don't own a single measuring spoon, meaning she had to "estimate" an actual tablespoon, we managed to make this without coming to blows. And I took just a little pleasure — okay, a lot — when it tasted just fine despite the inadequate cooking utensils chez Mom. Hah!

The original recipe calls for garam masala, but I didn't have any so we added a few different curry powders, cardomon and tumeric. My point is don't be afraid to experiment. Enjoy!

Indian Artichoke Dip

ingredients
1 14-ounce can artichoke hearts, drained
1 15-ounce can chickpeas, drained and rinsed
1 tablespoon mirin
1 tablespoon apple cider vinegar
2 teaspoons maple syrup
1 teaspoon spicy curry powder
1 teaspoon tumeric
1 teaspoon cardomon
1 teaspoon sweet curry powder
2 tablespoons tamari
salt to taste
paprika to garnish on top

method
Puree in the food processor and adjust to taste. Yup, it's that easy.

Friday, February 24, 2012

Speedy Shrimp Fried Rice


Janet here: First things first. The Divine Miss M is arriving in a matter of hours. Yes HOURS. It's been four-plus months since I last squeezed her and I CAN'T WAIT!!!!!!!

Okay. On to a quick recipe.

I don't know about you, but I often like the fried rice that comes with Chinese takeout as much as the entrees. It's one of those dishes that I've always wanted to make at home but wasn't sure where to begin, until I ripped out this recipe from the Food Network Magazine — yup another of my ripped recipes — and did a little tinkering. You can obviously tinker too. Try it with chicken or pork, or maybe just more veggies or ... I'd offer more options but I've got some squeezing to do. :)

Shrimp Fried Rice

ingredients
2 large eggs
salt to taste
2 tablespoons canola oil
1 1/2 tablespoons soy sauce
1 teaspoon sesame oil
1/2 pound medium shrimp, peeled, deveined and cut into pieces
1 tablespoon minced ginger
4 ounces snow peas
1 cup shredded carrots
1 bunch scallions, chopped
3 cups cooked rice

method

Whisk the eggs with a little salt in a small bowl. Heat 1 tablespoon of canola oil in a wok (or large skillet) over medium heat. Add the eggs and cook, without stirring, until almost set. Then flip the eggs with a spatula and cook until just set on the other side. Remove from heat to a board and then cut into strips.

Combine the soy sauce, sesame oil and 1 tablespoon of water in a small bowl and set aside. Heat the remaining tablespoon of canola oil in the same skillet over high heat. Add the shrimp and ginger and stir fry until almost cooked through, about 3 minutes. Add the snow peas, carrots and scallions and continue to stir fry until just done, about another minute. Add the rice and soy sauce and stir fry until just warmed through. Stir in the eggs and serve.

Wednesday, February 22, 2012

Leaving On A Jet Plane


We're packing our bags and heading out.


Getting ready to soar cross country, leaving California in the dark of early morning to land in Connecticut in the quiet of early night.


This means we're eating leftovers like it's our job. And lamenting the fact that I had to buy milk this morning.


It also means that in 36 hours I'll be eating in my ma's kitchen, sitting around that table I spent the better part of two decades at, now with my husband and my kid.


It's the kind of stuff that's good. Crazy good. Toddler-with-a-cupcake good.

What could be better?

Monday, February 20, 2012

Red Velvet Wonderfulness


Janet here: I have never met a cheesecake I didn't like. The creaminess, the cream cheese taste, the complete decadence — it is one of my favorite indulgences.

I am also a major fan of red velvet cupcakes (which I would just like to register a moment of complaint about here that at Rachel's wedding celebration in our backyard we had both red velvet cupcakes AND cheesecake cupcakes and I did not get a single one. Apparently our guests share my tastes.). Anyway given the combination of cheesecake and red velvet tastiness in this picture I saw in the February Food Network Magazine, it is no surprise I ripped this recipe out of the magazine immediately.

I probably should have done this post last week before Valentine's Day, based on the obvious red factor here. But while I made the cheesecake before VD, I went with something healthy instead. As you can tell, I didn't quite master the whole completely red thing (sometime between the last time I played with food coloring with my kids and now, food coloring has become a gel, which I didn't know exactly how to handle). I also think I need to practice the "pulling up" of the red velvet part of the cheesecake, which would also make it more red. Now practicing that is something I can get behind. :)


Red Velvet Cheesecake

ingredients for the crust

1 1/2 cups crushed chocolate cookies (the recipe calls for chocolate wafers; I couldn't find them so I used Oreos, which worked just fine)
5 tablespoons unsalted butter, melted
1/3 cup sugar
pinch salt

ingredients for filling
4 8-ounce packages cream cheese, softened
1 1/4 cups sugar
1 tablespoon fresh lemon juice
1 teaspoon vanilla
2 tablespoons flour
4 large eggs
1 tablespoon unsweetened cocoa powder
1 teaspoon red food coloring

method
Heat the oven to 350 degrees. Mix the cookie crumbs, the melted butter, sugar and salt in a bowl. The press into the bottom and a little up the side of a spring-form pan. Put the pan on a baking sheet and bake until set, about 10 minutes. Let cool

To make the filling reduce the oven to 325 degrees. Beat the cream cheese, sugar, lemon juice and vanilla in a mixer about five minutes. Add the lour and then beat in the eggs, one at a time. Transfer two cups of the batter to a bowl. Stir in the cocoa powder and food coloring. The pour the red batter into the crust. Pour the white patter on top and using a spoon, pull up some of the red batter from the bottom and swirl. Be careful not to pull up any crust.

Bake until the edges are set but the center is wobbly, about one hour, 20 minutes.
Turn off the oven but keep the cake inside for 20 minutes. Run a knife around the edge of the pan (don't remove the spring-form side). Then transfer to a rack and let cool. Refrigerate at least four hours before slicing.

Friday, February 17, 2012

This Moment


A Friday ritual. A single photo - no words - capturing a moment from the week. Pause, savor, remember.

Wednesday, February 15, 2012

Chard Chips


Rachel here.

So, I was going to write a post for today about these amazing cupcakes I made for John as a Valentine's Day treat. He's a vanilla vanilla man (as in vanilla cake with vanilla frosting) and I found a recipe that used 6 egg whites instead of 2 whole eggs, generating the fluffiest, pillowiest little cupcakes I've ever put in my mouth. I also found a whipped frosting recipe which served as the perfect cloud-like topping for these treats. When I sat down to write, though, I realized that by the time you all read this, you'll probably have made your way through a whole box of chocolates--either from someone who has a crush on you or to celebrate your single status on the day dedicated to love. When I eat a whole box of chocolates (or, you know, half a batch of cupcakes...), I usually find myself jonesing for something savory the next day. Oh, and nutritious. I really like to follow up sugar binges with vegetables, thereby creating a zero sum equation in my head (or some such logic).

Enter chard chips.

You've probably heard of kale chips (I feel like they're all the rage, at least around these parts). Our neighbor gifted us with four bunches of chard the other night when she stopped by to borrow a measuring cup and spoons for her daughter's birthday cake. Not really paying attention, I just assumed it was kale because she's given us bunches from her garden several times in the last few months.

With 20 minutes to kill before our friend arrived to watch Max so we could go on a date, I washed the chard and then all three of us sat on the kitchen floor tearing it from its stalks into bite-sized pieces. Into the salad spinner it went until it was super dry and, from there, into a big bowl where I tossed it in olive oil and sea salt. John spread the chard on a baking sheet (at which point we both realized it was chard instead of kale...not sure why it took us so long since the two really do look pretty different from each other) and then put it into the oven at 350 degrees. Ten minutes later, when the edges had started to brown, we pulled it out.

Oh. My. God. Good.

Like, so good.

Like, pumpkin seeds on crack good (though, now that I've re-read that sentence, I'm pretty sure pumpkin seeds on crack is gross...but whatever, you follow).

And so easy! And so quick! And so good FOR you!

So grab a bunch of chard the next time you're at the market and whip up some chard chips. You'll be smiling and munching through your daily dose of vegetables.

Monday, February 13, 2012

Almond Pesto Magic


Janet here: After admitting my little magazine recipe-ripping, um, problem, I started 2012 with a new plan. I would start actually cooking some of these recipes and then, if I like them, put them in a neat little notebook. Last week I dutifully bought my notebook, complete with plastic sleeves to stick the pages in and dividers so I can organize them by categories. I was so pleased with myself.


But then it was time to attack the pile, a daunting task for sure because it is a mini-mountain by now. Happily we were having another couple for dinner so I found a new way of doing pesto, using almonds rather than pine nuts.....Result? Brilliant and a total keeper. Into its nice plastic sleeve it goes.

Enjoy!

Almond Pesto with Beans Linguine
from Food Network Magazine
serves 4

ingredients
1/2 cup unsalted roasted almonds
1 clove garlic
1 1/2 cups fresh parsley
1 1/2 cups fresh basil
1/4 cup grated Parmesan cheese
1/4 cup olive oil
1/3 cup ricotta cheese
1/2 cup chopped kalamata olives
12 ounces linguine
1 15-ounce can cannellini beans, drained and rinsed
2 plum tomatoes, chopped
salt and pepper to taste

method

Bring a pot of salted water for the linguine to a boil.

Make the pesto by pulsing the almonds and garlic in a food processor until finely chopped. Add the parsley, basil and Parmesan; pulse some more until the herbs are chopped. With the motor running drizzle in the olive oil until blended.

Transfer to a large bowl and add the ricotta and olives.

Cook the linguine, adding the beans for the last two minutes. Reserve one cup of the cooking water; then drain the pasta and beans. Add to the bowl with the pesto and toss to coat. Add the chopped tomatoes and as much of the reserved cooking water as you like to have the perfect combination. Salt and pepper to taste.

Friday, February 10, 2012

This Moment


A Friday ritual. A single photo - no words - capturing a moment from the week. Pause, savor, remember.

Wednesday, February 8, 2012

In the Kitchen, Family Style

Rachel here.

No recipe today. Just a moment instead.

We spent Saturday afternoon in the kitchen. John whipped up a gorgeous roast chicken, stuffed to the brim and lying in a bed of sweet potatoes, carrots and onion. It was simple and fresh and, after Maxine was in bed, it made the perfect date night dinner (we have dates on Saturdays, come hell or high water). While he did this, Max and I threw a thousand little bits and pieces into our slow cooker. A handful of corn, pinches of peas, tomato and chicken stock, freshly snapped green beans, carrots and celery and onion freshly sauteed, orzo...and then a little more, and whatever seasonings we could get our hands on from the spice drawer (which is in serious need of a restock). Chicken roasted, soup simmered, and for an hour or so there, all three of us were chitchatting and giggling while our hands worked, sharing tasting spoons and reveling in the warmth and good smells that seeped throughout our house.

I caught myself for a moment, thought "Oh! I'd better start writing this all down. I'd better start snapping pictures." But then I forgot, pulled back into the present by Maxine's request for a spoon to stir with or something like that. And I'm glad.

Because this little pocket in a Saturday afternoon?

It was one of those moments I'd always imagined for my family when I was growing up. Everyone was involved, we were focused on tending to our most basic needs, and none of it felt like work.

It was awesome.

Monday, February 6, 2012

Chocolate + Caramel = Amazing


Janet here:

Yes, the cookie obsession continues. Here's the inception of this particular combo. The setting: Casa de Roomie, where I live part-time as I travel between New York and Connecticut. Scene: I'm ripping out recipes from magazines (click here for my little, um, issue with this habit). Roomie is ripping out magazines for a vision board. Her daughter is finishing adding the finishing touches on a Modge Podge project.

Roomie: Oooh these cookies look good (coconut with gooey circles of caramel in the middle from a magazine).

Daughter of roomie: Oooh make those for my birthday please. I love coconut!

Me (not a fan of coconut): Oooh these would be good with chocolate instead of coconut, don't you think?

A few days later I'm in the kitchen, whipping up my variation of these little numbers and I'm just going to say that my hunch was correct. I have no idea how they'd be with coconut (and never will since I don't like it) but I can say with a degree of certainty, they are awesome with chocolate. Enjoy!

Chocolate Caramel Cookies
makes about two dozen

ingredients
2 1/4 cups flour
1/4 cup cocoa powder
1 teaspoon baking soda
1/2 teaspoon salt
1 cup unsalted butter, room temperature
3/4 cup sugar
3/4 cup brown sugar
2 eggs, room temperature
1 tablespoon vanilla
1 1/2 cups chocolate chips
about 20 Kraft caramel pieces
6 tablespoons heavy cream
fleur de sel (sea salt crystals)


method
Heat oven to 350 degrees.
Line baking sheets with parchment paper (which really is one of the great inventions and I can't believe I didn't ever use it until last year!). Combine the flour, cocoa powder, baking soda and salt in a bowl.

In another bowl mix the butter using an electric mixer or by hand (my method). Beat until light and creamy, however, you choose. Add the sugars, beating until light. Add the eggs and vanilla. Beat in the dry ingredients until just mixed.

Place spoonsful of the cookie dough on baking pans and bake for 15 minutes.

While the cookies are baking, melt the Kraft pieces in a pot with the heavy cream on low heat.

When the cookies come out of the oven, take a spoon and smoosh a little hole in the warm cookies. Pour about a teaspoonful of the melted caramel into the hole and then sprinkle a little fleur de sel over the cookies. How much salt you add is up to your own salt senses.

Friday, February 3, 2012

Fondue WHAT?

And now, ladies and gentlemen, for our monthly dose of wisdom from Mike the Gay Beer Guy. Be still our beating hearts...


Mike here.

We’ve all been there... you know, THAT couple that invites you over for a Fondue party. Cheese, oil, chocolate - it’s all the same. Little tiny forks sticking out of center bowl warned over a tiny burner. Well roll up your sleeves and get ready to impress your friends with this spiced up version! That’s right - HOT POT.

The Chinese version of dipped meats and vegis in a broth is loaded with all sorts of flavor; you can almost use anything you want. Be warned, though, it’s not for the light hearted... this is serious entertaining food that gets spicier and more intense as the evening goes on. To make it more of an event, instead of having a whole ton of food just for the two of us, T and I invited our friend (and fellow Hong Konger to T) over to partake in this Chinese winter staple (speaking of winter... as I write this it’s 65* outside in Kansas City... yeah, winter indeed).

The components: the chili oil, the broth, the sauce, and all the fixin’s... ready? Here we go!

Chili Oil:
Szechuan Peppercorns (found at the Asian Market)
Dried Chili Peppers
Canola Oil


This should be done a day in advance. There’s no set quantitative value to how much chilis or oil to use. Use your judgement! Start by toasting your chilis in a dry pan until they develop some color but don’t burn; once done, set aside in a bowl. Using the same pan, start toasting your Szechuan Peppercorns. The peppercrcorns will release an amazing aroma, which seems like it’s a combination of hot spice, pepper (like cracked black pepper), and a sour/vinegary flavor. When the peppercorns have developed a nice flavor, combine it back with the chilis and roughly crush with a mortar and pestle (we actually don’t own one... a stainless bowl and a mini-rolling pin work just as well!). In the pan, combine the peppers and the peppercorns with enough oil to cover, heat through, and then set in a heat proof bowl to rest overnight.


Broth:
Daikon Radish
Water
Chicken (or Pork) Broth
Seasonings
Chili Oil

The broth is simple... dice the radish into 1 inch pieces. Add the water and simmer... at some point taste the broth for flavor, adjust the seasoning. After you’ve sufficiently simmered the broth, add the chili oil to taste (we found that it was more pungent rather than spicy... but use your own judgement!). This is a great time to discuss the vessel you should use: a flat-bottomed pan a few inches deep to be able to simmer enough broth to cook the fixings of your choice. As you can see form the pictures, we have a mini butane fueled stove that sits in the middle of our table... it’s kinda similar to a camping stove, but safe for indoor use. Always be safe when making hot pot!!!! At some point before serving, you’ll want to add some of your fixings to the broth, not only to enhance flavor, but to give them a head start in the cooking process... but we’ll get into the details after the sauce.

OK, here we go... a quick warning. From here on, you might be dealing with raw and cooked-slightly-rare ingredients... At no point during this meal did I ever think I was going to get any form of food poisoning. We used fresh ingredients, which certainly helps to curve the nerves. But use your judgement! My thoughts are, especially being Mike TGBG, that if you drink enough alcohol you’ll either kill everything living in your system... or at least you’ll never remember being sick!

The Dipping Sauce & Fixin’s:
Egg
Chinese BBQ Paste
Soy Sauce

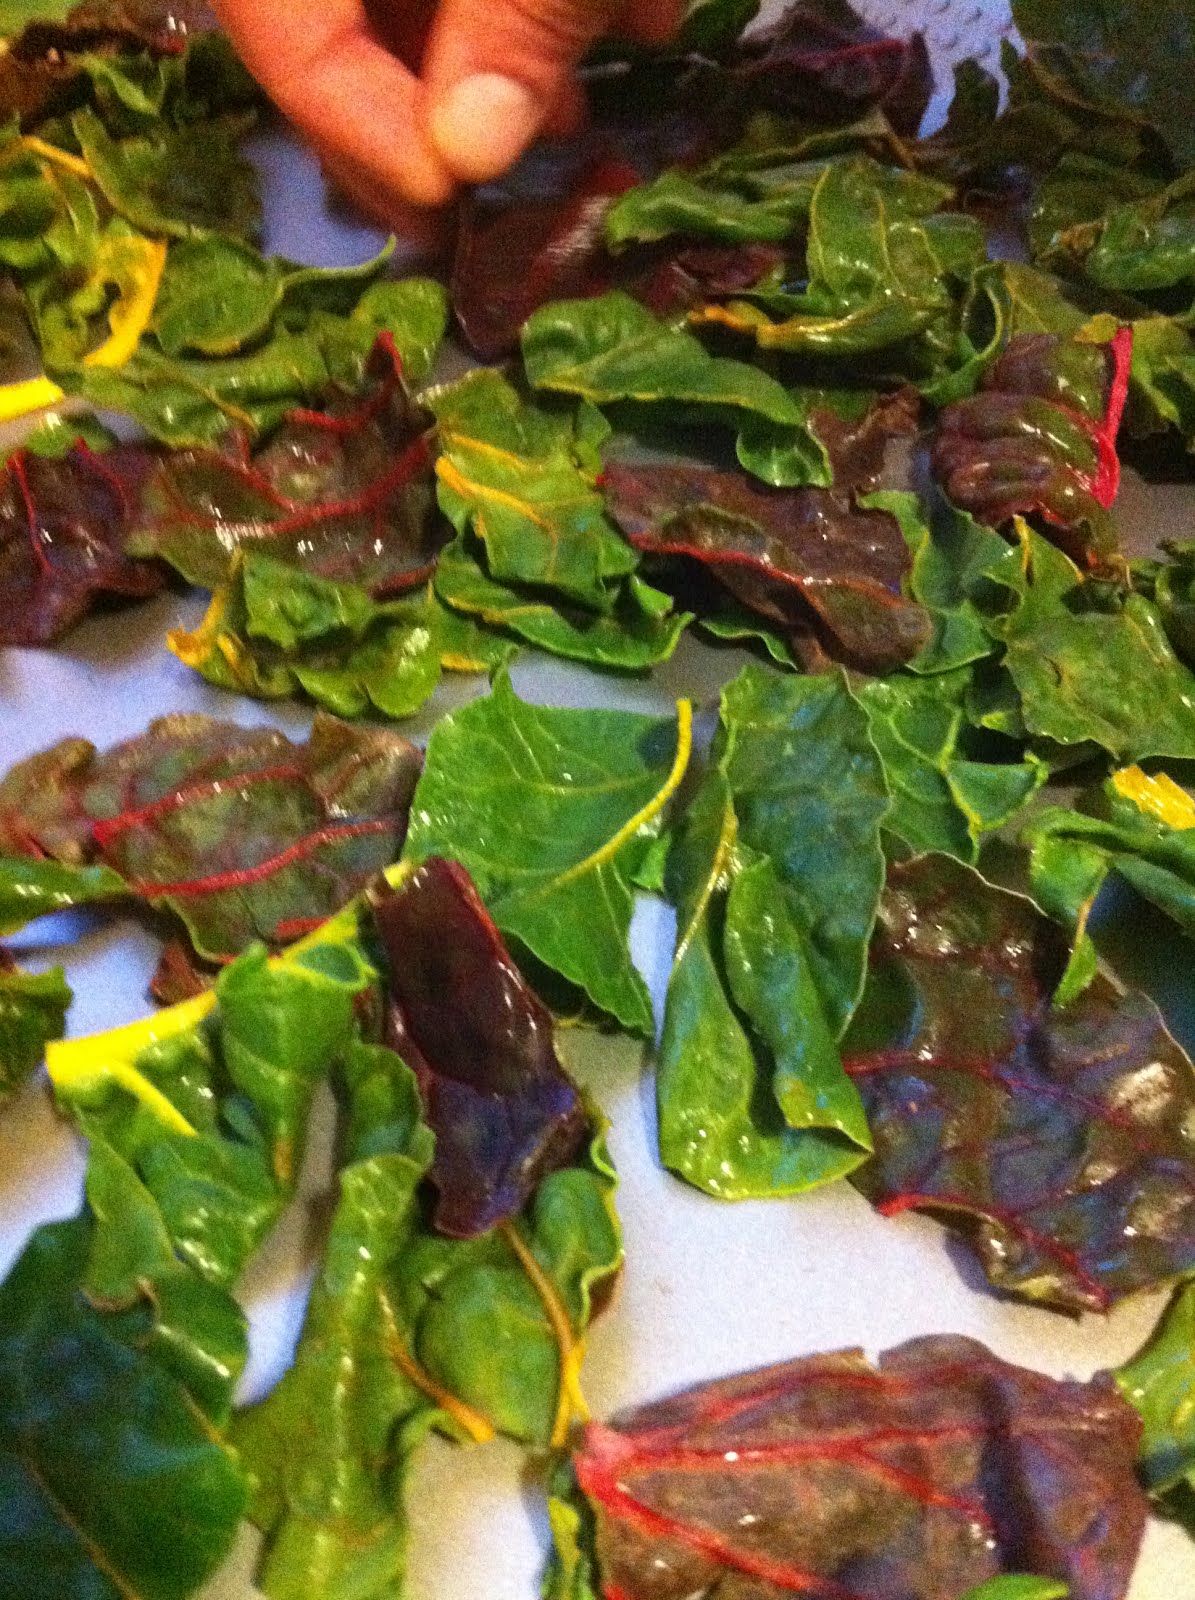
Now everyone get your individual bowl. Crack your egg into your bowl, add a dab of BBQ Paste and some soy sauce, and swirl it all around with your chop sticks (you know... chop sticks, right?!). You’re going to put your fixings into the simmering broth, let them cook to your liking, and plop them into your sauce. And then eat of course!!! When you get your broth into the middle of your table (on the flame) it’s probably a good time to add whatever long-cooking items... we had fish-balls, Chinese Meatballs, and mushrooms. Also on the table (and we had EVERYTHING there): beef, chicken, prawns, squid, muscles, noodles, cabbage, tofu, fermented tofu, more mushrooms... you name it. This can be as complicated or as simple as you want... just prep everything in advance and instant HOT POT!!!!


Imperial Mild

For this evening, I had on hand an Imperial Mild that I had brewed as a kit from Northern Brewer (http://www.northernbrewer.com). For those who don’t know, a Mild (as opposed to the hoppier “Bitter”) is an English Pub beer, usually about 3% or so ABV (it’s actually really hard to find one commercially... I know of no one in the US who makes one or imports one, and I’ve heard it’s very rare in Europe too!). This recipe calls for the same ingredients, just a little higher in alcohol, at about 5.5% ABV. Full of malty flavor and some caramel sweetness, this beer paired PERFECTLY with the hot and spicy Hot Pot. For my winter brewing, I plan most beers around extract recipes so I can brew indoors without having to stand in the outside cold for hours... here is the recipe just as I made it. Maybe over the summer I can plan a full-mash version!

OG: 1.062
ABV: 5.5%

Ingredients
6 lbs Munton’s Amber Dry Malt Extract
1 lb Corn Sugar
4 oz each English Dark Crystal, Extra-Dark Crystal, and Pale Chocolate Malts
2 oz Victory Malt
2 ½ oz Fuggles at 60 minutes
½ oz Fuggles at 15 min
WY1187 - Ringwood Ale Yeast

Method - Back to Basics... partial wort boil on the stove

Crush and steep your specialty malts (in a mesh bag) in about a gallon of 160* water for about 30 minutes. After 30 minutes, collect about 4 gallons in your kettle as you drain your bag of crushed grains (don’t squeeze out every last bit of liquid!!! Just simply drain the bag of grains over the kettle! When the bag doesn’t drip, throw it away). Off heat, add the extract to the water, stir to dissolve well, and bring the wort (solution of sugars) to a boil. When you achieve boil, add your 60 min hops (you can cover the kettle to help a boil come about, but then the lid should be off until you’re ready to cool the wort); boil for 45 min, add your 15 minute hops and corn sugar, and continue to boil for the remaining 15 minutes. When the hour boil is over, cool the kettle in an ice bath in the sink (or bath tub or whatever). While the kettle is cooling, prepare your fermentation vessel... sanitize, sanitize, SANITIZE!!! The wort in the kettle is essentially sterile (although there are spores and other potential contaminants still in solution, the nasty and potentially beer-hazardous stuff has been thoroughly killed off) and you want to give your yeast the optimum and clean environment to work! When the wort is cool to the touch (ideally around 60*-70*, but any temperature which won’t kill your yeast will work), pour it into your fermentation vessel; food-grade plastic buckets are easy, but those with carboys will need either a friend and a funnel or to siphon. Your fermenter should be able to hold 6 ½ gallons of liquid... when the wort is in the fermenter, top off with clean spring water or previously boiled and cooled tap water to about 5 ½ gallons; you will have about a gallon of open head space. From here, the easiest thing to do is just pitch your yeast and cover the vessel... plastic buckets can accommodate a sanitized airlock in the lid or use a sanitized piece of foil for your carboy (I only use stoppers and airlocks for any beer I’ll leave in the fermenter for longer than 2 weeks). My procedure is a little more controlled: I make sure my wort has cooled to 60*, pitch my yeast, and then raise the temperature to 65* (assuming the temperature inside the carboy will be around 67*-68*) through the use of a heat wrap and temperature controller. Ferment until the beer has visibly stopped moving and the majority of yeast has fallen out of suspension... and then wait another 3 or 4 days after that!! Keg or bottle and carbonate VERY low... I actually prefer this beer almost still. If you bottle and add priming sugar, use ⅓ to ½ of what you would normally add. For you keggers out there (my included), just put enough head pressure on the keg to serve!


Cheers
- Mike TGBG

Wednesday, February 1, 2012

Help!

Rachel here.

My ma mentioned in her last post that Maxine has been diagnosed with MRSA. As anyone who's familiar with that difficult mistress knows, this means there's been a ton--TON--of cleaning in our house lately. Like, every single thing, every single day. Needless to say, cooking has taken the back burner around these parts. We have remembered out of necessity and a desire not to wash anything extra that a good portion of our refrigerator is happily and deliciously consumed raw. Yeah, these are the salad days.

I have a question for all of you dear readers of ours. Part of our daily routine now involves shoving medications up Max's nose and down her throat. The nose part sucks, but the kid is happily rewarded for her willing participation by being granted access to my jewelry. Last night--no joke!--she was walking around in strings of pearls with an arm laden with my grandmother's gold bracelets and pajamas. It was pretty cute and the sparkle seemed to help her forgot her burning nostrils. The hard part--and this is where I'm pleading with you for your own tricks!--is getting liquid meds in her. We've tried putting them in her food. We've tried milk with honey. We've accepted that the taste is too foul and the quantity too great to expect her to take them on their own. I know some of you have kids. How have you navigated this dilemma? We'll try anything.

Thanks guys! Go team!