Showing posts with label eggs. Show all posts

Monday, August 1, 2011

Brunch Schmunch


Janet here:

This recipe (or my variation) was touted in the most recent issue of Food Network Magazine (I swear I am not a paid shill for this magazine; it's just that this month had a ton of inspirational recipes!) as a brunch recipe. I made it (with a few tweaks) for dinner and it was fabulous. So whatever. You decide.

Eggs with Squash

serves 3

ingredients
2 pounds zucchini, grated
2 tablespoons olive oil
3 scallions, diced
red pepper flakes to taste
3 tablespoons chopped fresh parsley
1/4 teaspoon nutmeg
salt and pepper to taste
1 tablespoon butter
4 eggs
1/2 cup grated sharp cheddar cheese

method
Grate the zucchini into a colander. Toss with 1 tablespoon of salt and let drain in sink for about 40 minutes. Squeeze to remove as much liquid as possible.

While the zucchini is deliquifying, heat the oven to 375 degrees. Put the olive oil in a large ovenproof skillet. Add the scallions and saute. Add the red pepper flakes and salt. Cook until the scallions are soft, about 3 minutes. Add the shredded and dry zucchini. Cook about 7 minutes, stirring occasionally. Add the parsley, nutmeg and pepper to taste. Cook until the mixture is slightly dry. Remove from heat and cool


Make sure the zucchini is evenly spread out in the pan. Make four little holes in the mixture. Put a little pat of butter in each hole. Crack an egg one at a time and pour into each hole. Add the grated cheese on top. Put the skillet into the oven and cooked 12-15 minutes until the eggs are cooked the way you like them.

Serve and enjoy

Monday, February 28, 2011

Purgatory Is Lovely


Rachel here.

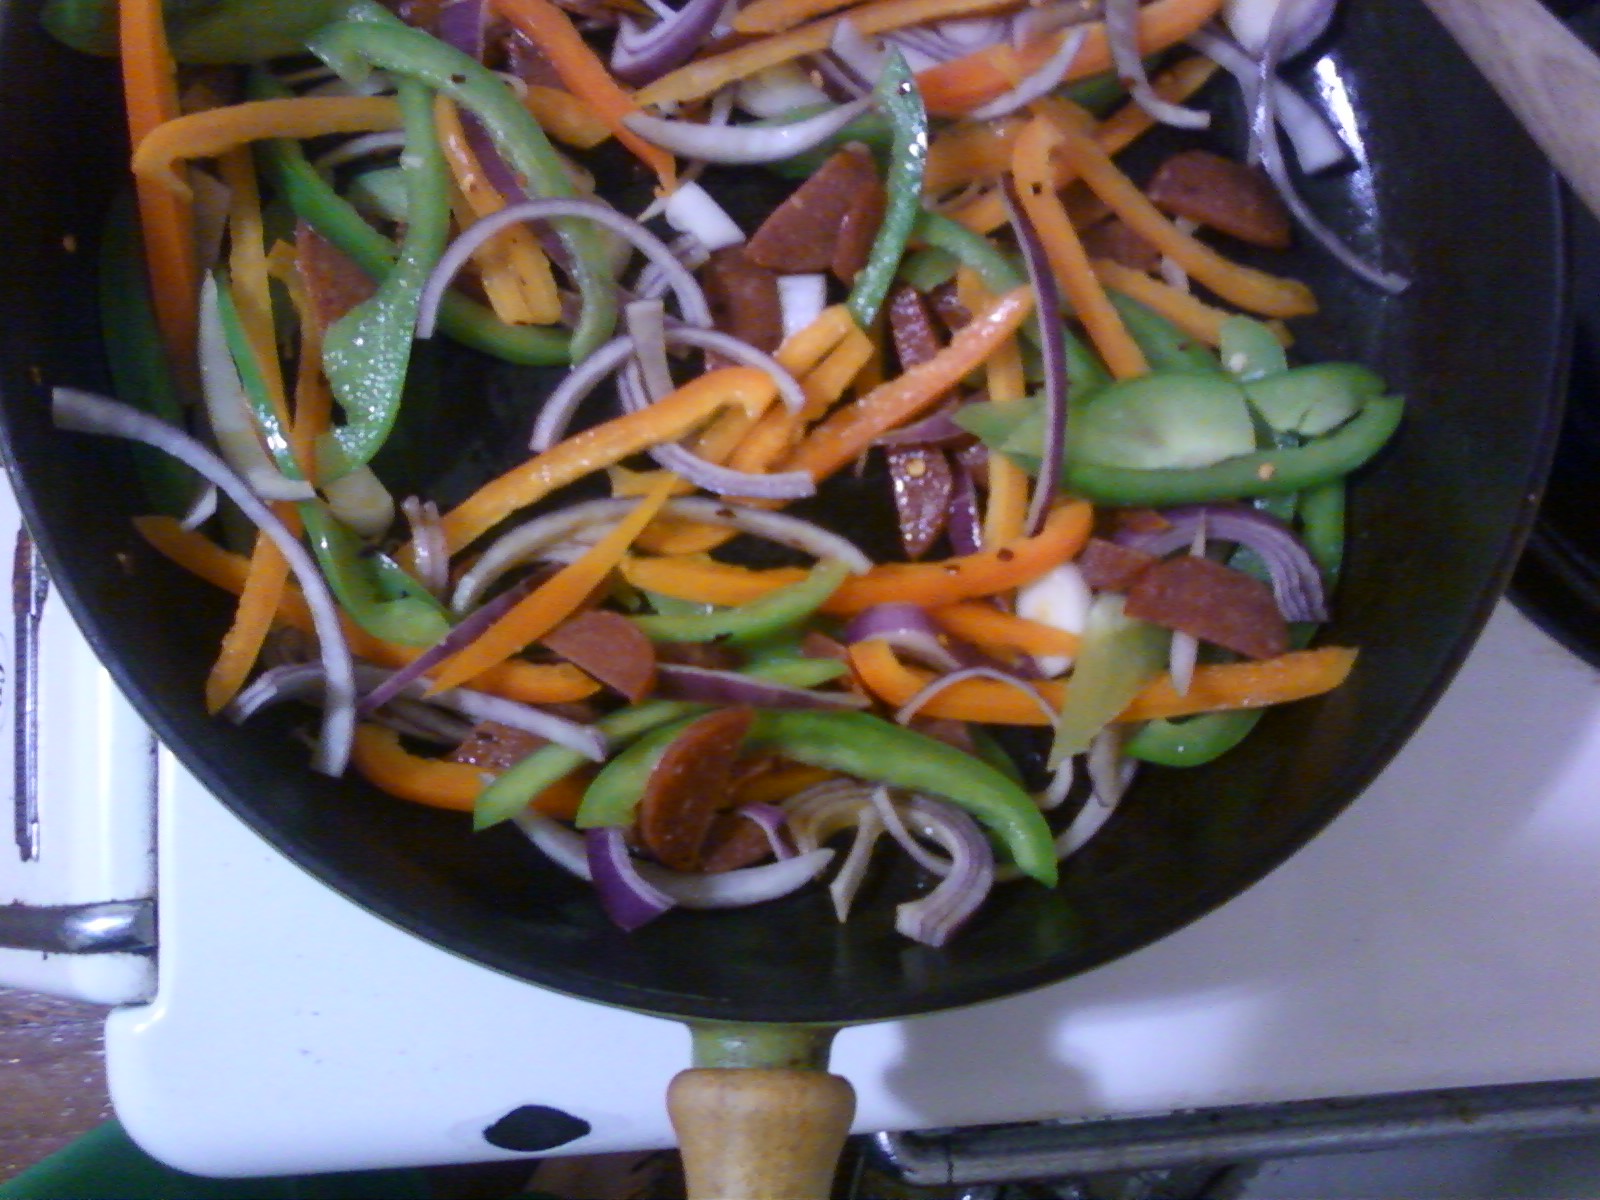
Ok, so first off, pardon the photos. I accidentally spilled a giant glass of water all over my camera in an effort not to spill coffee all over my computer (ok, probably too many beverages around valuable and expensive pieces of equipment...lesson learned). While my computer was spared (::phew::), my camera has decided to open but nothing else. Awesome. So these photos were taken on my cell phone. Better than no photos? Probably, but definitely not ideal.


What I made the other night was Eggs in Purgatory. What I will now be making probably once a week is Eggs in Purgatory. You know those bits in your fridge that are still good but instead of trying to navigate the tedium of figuring out a delicious way to use them all you close the fridge door, hoping that by the next time you open it they'll have turned and you can legitimately throw them away? Here is your solution.


Click here for the original recipe that I found on the Food Network. The version I made followed the general form but I had substitutions for most of the ingredients (pepperoni instead of salami, different peppers, no parsley, etc.). Therein lies the brilliance of this dish. I could see it working well with mushrooms or potato, some spinach...really, just about anything.

OH! And it's easy. Really easy. And quick, too. It's like, the perfect recipe for weeknight cooking.


Have you ever made this dish before? A variation on this theme? What do you do with the incredible edible egg?

Thursday, September 30, 2010

When the Going Gets Tough, the Tough Get a Treat


Hey Ma,

As you know, I'm dutifully working my way through midterms right now. Though certainly challenging, I sort of thought it would be impossible to do and feel like an attentive mother/partner/sister/self and I'm pleased to report that so far this doesn't seem to be the case.

Anyway, I've always been a firm believer that when the going gets tough the tough get a treat. What form the treat takes isn't nearly as important as the feeling that it's a treat. And so today, instead of eating my usual yogurt with granola, I packed up M's and my things and we went to the Homemade Cafe where John works for a special breakfast.

I love taking M to the Homemade for many reasons, but one of them is admittedly that she usually sleeps when we're there. This isn't unique to her by any stretch. When I worked there I witnessed countless babies blissfully asleep while their parents blissfully ate. What this meant for me today was that I could get some work done while enjoying a breakfast I didn't make myself and M would get a timely nap. Talk about multitasking, right?

Of course, M's nap didn't amount to what it usually does. That's neither here nor there, though. I sat and ate eggs and toast (so simple and so good) and read some Nietzsche while M dozed and it felt like exactly what I wanted it to: a treat. I felt fueled enough to go home and finish writing a paper and all day I've had that little extra bit of happiness for having broken from the work routine and given myself a little something special.

Do you agree with my treat theory? How do you treat yourself?

xxoo
R

Friday, June 4, 2010

Homemade Pasta


Rachel here: When John and I were first together, one of our favorite things to do was cook. Prior to meeting John, I worked in restaurants and lived alone. Outside of work (where I was heartily fed), I mainly subsisted on grits and fruit. Though I would definitely relate differently to cooking for myself now than I did then, at the age of 19 or 20, my top goal in eating at home was to generate as few dirty dishes as possible. Anyway, enter John. Here was a man who not only enjoyed but excelled at cooking, who wanted to make me dishes of food I had never tried and who genuinely enjoyed eating. On our way home from work, walking our bikes instead of riding so that we could talk, we'd more often than not get to talking about dinner and stop by the grocery store en route to pick up the various ingredients we'd need to make whatever had struck our fancy. To shop and eat in this fashion felt incredibly luxurious. Fast forward five years and, as a general rule, we no longer spend our afternoons and evenings planning and generating whimsical meals. We are busy, busy bees these days and no longer live nearly across the street from a fantastic grocery as we did in our earlier days. Still, though, one of my favorite ways to spend the twilight hours of a weekend home with John is over a completely homemade meal that we have prepared together. The food tastes and feels so good and I couldn't ask for better company.

This past weekend afforded us just such a window to get into the kitchen together. A few years back, John convinced me that homemade pasta is significantly better than its store-bought counterpart and, though we usually end up eating the latter for its convenience, this weekend John taught me how to make pasta by myself. It is surprisingly easy, though it does take a little muscle, and we generated two lasagnas from our endeavors, one for dinner and one for the freezer for the days after M makes her grand debut. If you've never tried your hand at pasta making before, I highly recommend that you give it a whirl. It is simple and satisfying and really, truly the best way to eat pasta.


Ingredients
1 egg (supposedly the fresher the better)
1 c. all-purpose flour
water
semolina flour

Method
In a large bowl, form the all-purpose flour into a well. Crack the egg into the center of the well and stir with a fork. As you stir the egg, it will gradually pull flour in. Keep at this until you are completely unable to stir anymore. At this juncture, add a teaspoon of water. Once all of your flour has been combined with another ingredient (either egg or water, or both), turn it out onto your countertop. Knead, twist and fold diligently until the dough becomes incorporated. Add more water, no more than a teaspoon at a time, whenever you are convinced that there isn't a single additional drop of moisture to be utilized towards forming a coherent ball of dough. This kneading process should take at least 15 minutes (in my experience). Once you have a ball of dough, wrap it tightly in plastic wrap and let rest for 45 minutes. Roll it out as thinly as you desire (either using a pasta roller or a rolling pin) and then cut into your desired shape. I folded my dough, dusting it with semolina flour between layers so the pasta wouldn't stick to itself, before cutting so I could get uniform shapes. Voila! Cook as you would normally cook pasta, though you should know that homemade pasta will cook noticeably faster than the dried store-bought stuff.


For our lasagna, we mixed chopped scallions and basil in with the ricotta (along with some salt and pepper) and sauteed spinach and mushrooms with garlic before layering everything with parmesan cheese and tomato sauce. Yum! What will you do with your delicious pasta?


Janet here: What I plan to do with the delicious lasagna I now know is waiting for me, not M, is eat it and enjoy every last bite. I know for a fact that homemade pasta is absolutely the way to go, but the likelihood that I will add this to my culinary life in the near future is, well, zero. I will, however, promise to fill the hole in the freezer that is made when I eat Rachel and John's lasagna.

Monday, April 19, 2010

Quick and Easy Quiche


Rachel here: I suppose it's a little redundant to call quiche "quick and easy". The reason I call the recipe I'm sharing today quick and easy, though, is because in my house we simply don't do store-bought pie crusts. One has never entered our home and it seems quite likely one never will (unless, of course, somebody other than John or I brings it through the doors). We are each competent pie crust makers in our own right and this is a source of culinary pride. The only problem, of course, is that we don't always feel like making pie crust from scratch. When it comes to quiche, this left me in a pickle the first time I made it. Unwilling to use a store-bought crust and completely uninterested in generating my own, I pondered and pondered an alternative way to get a bit of crusty texture into my quiche without spending way more time in the kitchen than I wanted to or succumbing to the grocery store option. What I arrived at was a layer of breadcrumbs on the bottom of the pie plate and, seriously, I have never looked back. Nobody's uttered a complaint (which isn't to say that they aren't secretly missing the true pie crust, just that their longing is satisfactorily abated by the bread crumbs) so far and I'm cautiously optimistic that they won't. The other perk to using bread crumbs, of course, is that you can make them if you don't have them already (since most of us have bread on hand), meaning you can make quiche almost anytime you have bread and eggs and some miscellaneous filling options in your refrigerator. I, personally, love food like this.

So, I have to make a confession before I share my recipe: I actually made two quiches. John and I are taking a fantastic birth class right now at Birthways in Berkeley and each Saturday there is a potluck lunch during class (this lunch may be part of why I love the class so much...there is so much yummy food that the next day I find myself longing for this smorgasbord come noontime). Each week each birthing team brings something different and our assignment for this past Saturday was quiche. Friday night I dutifully made quiche for the class; Saturday morning I woke up at 6 am in a panic that there would be something wrong with it. I hauled myself out of bed (hauling is the only word for getting out of bed these days with this belly), stumbled into the kitchen and made a second quiche just so I could cut into the first one and serve the second one with confidence to my pregnant cohorts and their birth partners. Yup, this is how my life gets told in recipes sometimes: neurosis worked out in the kitchen.

And now for the recipe, which you should make with GREAT confidence, since after making it twice in a row I can say that it is quick, easy and delicious (oh yeah, and truly pretty foolproof).

Quick and Easy Quiche

Ingredients
breadcrumbs
7 eggs
1 c. milk
4 large basil leaves, torn into bits
1 c. scallions, chopped
1 c. tomatoes, diced
1 c. smoked gouda, shredded
salt and pepper

Method
Preheat your oven to 375 degrees. Line the bottom of a 9" pie plate with bread crumbs so the bottom is completely covered and can't be seen (about a 1/2 inch). In a medium bowl, lightly beat the eggs with a fork (DO NOT use a whisk because later on everything that you mix into the eggs will get stuck in it). Mix in the milk. Add the basil, scallions, tomatoes and cheese along with salt and pepper to taste (a dash of cayenne will add a little pop, too), stirring in well. Pour into your pie plate and place in oven. Bake until the quiche is completely set, around 30 minutes (it's done when the inside is as set as the outside). Remove, cool and serve either slightly warm or at room temperature. Great for breakfast, lunch or dinner!

Janet here: It's hard to know where to begin with this post after all Rachel's admissions. A counselor would be having a field day here is all I can say. But let me just say this:

I use store-bought pie crust all the time for quiche and it's just fine thank you very much. So any of you readers who are feeling a little intimidated by this whole only-homemade-pie-crust-will-count thing should just relax and do what works best for you. I will add, however, that the bread crumbs concept is brilliant (oh and yes I use premade store-bought bread crumbs too rather than whipping up my own from bread--presumably homemade bread). I will absolutely try this down the road.

Crust aside, I agree quiche is an easy dinner. Add a little salad and maybe soup and bread, and you've got a complete happy meal. What I love about quiche is that it's a food free-for-all. You can add whatever you want to the mix and it's generally just fine.

My most recent quiche was about 3/4 pounds cooked turkey bacon and about 1 1/2 cups of grated gruyere. Just delicious.

Monday, April 5, 2010

Egg-cellent Eggs


Rachel here: I hadn't dyed eggs since I lived with my parents, I don't think, and though there is absolutely zero recognition of Easter in my house, it just seemed like so much fun that I called John at work and asked him if he'd join me in dyeing them when he got home. He was game, as he usually is for art projects/things that involve making messes. Anyway, figuring there was no way in hell I'd find Easter egg dye kits at this late date, I decided to employ food coloring for our dyeing experience. There are directions on the back of all food coloring packages and it was really quite simple. We used brown eggs because that was what was in the refrigerator and though this affected the end color, neither of us felt it was a problem. We had fun and, though I had intended to use the eggs to make egg salad, we ended up eating all of them (I only boiled six) promptly. Oops! Hard-boiled eggs are such a good snack and dyeing them is so satisfying that I'm considering extracting this tradition from the confines of Easter and dyeing eggs year round. They're so bright and pretty on the refrigerator shelf!


Janet here: In contrast to Rachel, who dyed her first Easter eggs, it's very possible I just dyed my last batch with our youngest heading off to college next year. Maybe we'll do it with the grandchild, although it's just as possible it won't happen. Anyway, the main reason to dye all these hard-boiled eggs is to make delicious deviled eggs and egg salad. I remember the first time I had deviled eggs. It was at my grandmother's house and I was amazed a hard-boiled egg could taste so good. Instead of sticking to the roof of my mouth the way plain old hard-boiled eggs do, these little wonders featured mayonnaise and dill. Delicious!

ingredients
hard-boiled eggs
mayonnaise
catsup
dill weed
salt/pepper

method
Boil the eggs. Once the eggs are cooled, cut them in half and scoop out the yolk. Put the white halves aside. Mash the yolks and add 1-2 tablespoons of mayonnaise, about 1 tablespoon catsup and dill weed/salt/pepper to taste. The amounts are an approximation, depending on how mushy you want your innards. Mash it all together some more and then scoop back into the eggs. Voila!

Monday, March 29, 2010

What's for Breakfast?


Rachel here: Ok, so I'm back. Get excited. For my first post this week I made waffles. To be honest, though, I really made waffles three times. I only photographed them the last time, though, when I made them for John's birthday breakfast (along with eggs scrambled with cheddar cheese and slices of apple). The first two times I made them were for myself last week. Those times I used leftover pancake batter (things with which one can eat maple syrup have become umm...important to me as of late...like, really important) figuring they would yield slightly lesser waffles, but delicious ones (and ones with maple syrup on them) all the same.

I was wrong.

The waffles I made last week using pancake batter were totally better than the ones I made for John's birthday breakfast (sorry, sweetheart). While the waffles I made for John (and which are photographed above...clearly they were still edible) were adequate, they grew tough quickly as they cooled (not the case with my pancake batter waffles). And so, though I have a few leftover and I will absolutely dutifully eat them, below I am going to post the waffle batter recipe from The Best Recipe by Cook's Illustrated in addition to the pancake batter recipe I adapted which, to my taste, worked out much better.

Also, I should confess that part of my waffle making frenzy was the result of a desire to make some and freeze them for down the road. And yet, three batters later, there are still no frozen waffles in my house. Oops!

Oh! One more thing. If savory's more your schtick, check out my ma's egg casserole down below. She didn't have a photo, but it sounds absolutely fantastic (as in, I want it for dinner). Enjoy!

Waffles
makes 4-8 depending on size of waffle iron

Ingredients
2 c. all-purpose flour
2 T. cornmeal (optional...I opted...it was only sort of noticeable)
1 tspn. salt
1/2 tspn. baking soda
2 eggs, separated
1 3/4 c. buttermilk
4 T. butter, melted

Method
First, get your waffle iron going. In a medium bowl, whisk together the dry ingredients. In a small bowl, combine the egg yolks and buttermilk. Beat the egg whites until they form stiff 2-inch peaks. Add the yolk/buttermilk mixture to the dries in a steady stream while mixing gently with a rubber spatula. Do not over mix. Towards the end, add the egg whites, folding them in until just incorporated. Batter should be lumpy and thick. Scoop batter into waffle iron and cook to desired crispness. Serve immediately and enjoy!

Pancakes Batter That Works for Waffles

Ingredients
1 c. all-purpose flour
2 tspn. sugar
1/2 tspn. salt
1/2 tspn. baking powder
1/4 tspn. baking soda
3/4 c. buttermilk
1/4 c. milk
1 large egg
2 T. unsalted butter, melted

Method
Turn waffle iron on. Whisk dry ingredients in a medium bowl. In a 2-cup measuring cup, combine buttermilk, milk, egg and butter, mixing well (don't add butter when it's super hot or it will cook your egg). Pour into dry ingredients and mix until just combined. Pour into waffle iron (or onto a skillet to make pancakes--just oil the surface first!) and cook to your desired crispness and color. Enjoy!


Janet here: This casserole will feed an army, so it is perfect for brunches or, as in the debut of this particular casserole, for a baby shower or some other kind of brunchy event. I have made it with sausage, bacon, grilled veggies and lox — all to rave reviews. Oh, yes, and it's simple.

Susan's Egg Casserole
serves 12-14

Ingredients
12 eggs
9 slices of white bread, crust cut off, and cut into 1/2" pieces
3 cups milk
6 scallions, diced
1/4 cup chopped, drained pimentos
2 lbs. sausage, cut up (or bacon or smoked salmon; your choice of meat goodies. I've done all of them at various points.)
2 cups grated cheddar cheese
salt and pepper to taste

Method
The trickiest part is just remembering you have to do this the night before cooking. Toss it all into a bowl. Mix. Put into a 9" X 13" casserole pan. Cover and refrigerate overnight.

The next day pop it into a 300-degree oven for 60 minutes and get ready to listen to the oohs and ahhs.