Wednesday, February 29, 2012

You're Welcome


Rachel here.

Do you see that picture? Do you know what it's of?

IT'S HOMEMADE SNICKERS BARS.

And now that you've put that all together, you understand the need for all caps. I mean, come ON. Had you ever even imagined that such a wonder existed in the world? I say this as someone who has witnessed the miracle of birth relatively recently, too. And yes, I'm putting the bars and the baby on the same spectrum of holy-crap awesomeness.

This is how I came to have the amazing good fortune of snapping the above shot. I was on Pinterest (yes, yes, I may need a pintervention...) when suddenly, before my eyes, a vision appeared. I rubbed them to make sure it wasn't a mirage. Could it really be? Could Snickers bars be made at HOME? As regular readers know, I'm a pretty staunch believer that most things can be made better by our own two hands than whatever crazy factory processes are capable of behind closed doors. In other words, there was no way that a homemade Snickers wouldn't be better than it's store-bought counterpart.

And then I figured out a way to make them even better...have my MA make them instead of me! So I quickly emailed the link with a note saying something like, "It's so sweet of you to fly us all out for a visit, but I'll know you truly love me if you make these for me." And, because she really DOES love me, she did. On Friday. And I have eaten two a day since, because two homemade Snickers a day keeps...oh, who needs a reason.

The lovely lady who generated this recipe writes over here at How Sweet It Is. Her name is Jessica, and it's totally fair to say that her homemade Snickers bars are a gateway drug into the awesome realm of her beautiful blog. Seriously--after sending my ma the recipe I spent the rest of Maxine's nap perusing Jessica's recipe files, chuckling out loud and bookmarking future culinary endeavors.

Click here for the recipe. Our friendship will suffer if you don't.

Monday, February 27, 2012

Vegan Artichoke Dip


Exciting doings here at LTIR central: Rachel and I are actually cooking together because she is visiting the East Coast. Last night we whipped up this tasty dip inspired by a recipe from Blissful Bites by Christy Morgan (a cookbook we highly recommend).

Despite Rachel freaking out just a little because I don't own a single measuring spoon, meaning she had to "estimate" an actual tablespoon, we managed to make this without coming to blows. And I took just a little pleasure — okay, a lot — when it tasted just fine despite the inadequate cooking utensils chez Mom. Hah!

The original recipe calls for garam masala, but I didn't have any so we added a few different curry powders, cardomon and tumeric. My point is don't be afraid to experiment. Enjoy!

Indian Artichoke Dip

ingredients
1 14-ounce can artichoke hearts, drained
1 15-ounce can chickpeas, drained and rinsed
1 tablespoon mirin
1 tablespoon apple cider vinegar
2 teaspoons maple syrup
1 teaspoon spicy curry powder
1 teaspoon tumeric
1 teaspoon cardomon
1 teaspoon sweet curry powder
2 tablespoons tamari
salt to taste
paprika to garnish on top

method
Puree in the food processor and adjust to taste. Yup, it's that easy.

Friday, February 24, 2012

Speedy Shrimp Fried Rice


Janet here: First things first. The Divine Miss M is arriving in a matter of hours. Yes HOURS. It's been four-plus months since I last squeezed her and I CAN'T WAIT!!!!!!!

Okay. On to a quick recipe.

I don't know about you, but I often like the fried rice that comes with Chinese takeout as much as the entrees. It's one of those dishes that I've always wanted to make at home but wasn't sure where to begin, until I ripped out this recipe from the Food Network Magazine — yup another of my ripped recipes — and did a little tinkering. You can obviously tinker too. Try it with chicken or pork, or maybe just more veggies or ... I'd offer more options but I've got some squeezing to do. :)

Shrimp Fried Rice

ingredients
2 large eggs
salt to taste
2 tablespoons canola oil
1 1/2 tablespoons soy sauce
1 teaspoon sesame oil
1/2 pound medium shrimp, peeled, deveined and cut into pieces
1 tablespoon minced ginger
4 ounces snow peas
1 cup shredded carrots
1 bunch scallions, chopped
3 cups cooked rice

method

Whisk the eggs with a little salt in a small bowl. Heat 1 tablespoon of canola oil in a wok (or large skillet) over medium heat. Add the eggs and cook, without stirring, until almost set. Then flip the eggs with a spatula and cook until just set on the other side. Remove from heat to a board and then cut into strips.

Combine the soy sauce, sesame oil and 1 tablespoon of water in a small bowl and set aside. Heat the remaining tablespoon of canola oil in the same skillet over high heat. Add the shrimp and ginger and stir fry until almost cooked through, about 3 minutes. Add the snow peas, carrots and scallions and continue to stir fry until just done, about another minute. Add the rice and soy sauce and stir fry until just warmed through. Stir in the eggs and serve.

Wednesday, February 22, 2012

Leaving On A Jet Plane


We're packing our bags and heading out.


Getting ready to soar cross country, leaving California in the dark of early morning to land in Connecticut in the quiet of early night.


This means we're eating leftovers like it's our job. And lamenting the fact that I had to buy milk this morning.


It also means that in 36 hours I'll be eating in my ma's kitchen, sitting around that table I spent the better part of two decades at, now with my husband and my kid.


It's the kind of stuff that's good. Crazy good. Toddler-with-a-cupcake good.

What could be better?

Monday, February 20, 2012

Red Velvet Wonderfulness


Janet here: I have never met a cheesecake I didn't like. The creaminess, the cream cheese taste, the complete decadence — it is one of my favorite indulgences.

I am also a major fan of red velvet cupcakes (which I would just like to register a moment of complaint about here that at Rachel's wedding celebration in our backyard we had both red velvet cupcakes AND cheesecake cupcakes and I did not get a single one. Apparently our guests share my tastes.). Anyway given the combination of cheesecake and red velvet tastiness in this picture I saw in the February Food Network Magazine, it is no surprise I ripped this recipe out of the magazine immediately.

I probably should have done this post last week before Valentine's Day, based on the obvious red factor here. But while I made the cheesecake before VD, I went with something healthy instead. As you can tell, I didn't quite master the whole completely red thing (sometime between the last time I played with food coloring with my kids and now, food coloring has become a gel, which I didn't know exactly how to handle). I also think I need to practice the "pulling up" of the red velvet part of the cheesecake, which would also make it more red. Now practicing that is something I can get behind. :)


Red Velvet Cheesecake

ingredients for the crust

1 1/2 cups crushed chocolate cookies (the recipe calls for chocolate wafers; I couldn't find them so I used Oreos, which worked just fine)
5 tablespoons unsalted butter, melted
1/3 cup sugar
pinch salt

ingredients for filling
4 8-ounce packages cream cheese, softened
1 1/4 cups sugar
1 tablespoon fresh lemon juice
1 teaspoon vanilla
2 tablespoons flour
4 large eggs
1 tablespoon unsweetened cocoa powder
1 teaspoon red food coloring

method
Heat the oven to 350 degrees. Mix the cookie crumbs, the melted butter, sugar and salt in a bowl. The press into the bottom and a little up the side of a spring-form pan. Put the pan on a baking sheet and bake until set, about 10 minutes. Let cool

To make the filling reduce the oven to 325 degrees. Beat the cream cheese, sugar, lemon juice and vanilla in a mixer about five minutes. Add the lour and then beat in the eggs, one at a time. Transfer two cups of the batter to a bowl. Stir in the cocoa powder and food coloring. The pour the red batter into the crust. Pour the white patter on top and using a spoon, pull up some of the red batter from the bottom and swirl. Be careful not to pull up any crust.

Bake until the edges are set but the center is wobbly, about one hour, 20 minutes.
Turn off the oven but keep the cake inside for 20 minutes. Run a knife around the edge of the pan (don't remove the spring-form side). Then transfer to a rack and let cool. Refrigerate at least four hours before slicing.

Friday, February 17, 2012

This Moment


A Friday ritual. A single photo - no words - capturing a moment from the week. Pause, savor, remember.

Wednesday, February 15, 2012

Chard Chips


Rachel here.

So, I was going to write a post for today about these amazing cupcakes I made for John as a Valentine's Day treat. He's a vanilla vanilla man (as in vanilla cake with vanilla frosting) and I found a recipe that used 6 egg whites instead of 2 whole eggs, generating the fluffiest, pillowiest little cupcakes I've ever put in my mouth. I also found a whipped frosting recipe which served as the perfect cloud-like topping for these treats. When I sat down to write, though, I realized that by the time you all read this, you'll probably have made your way through a whole box of chocolates--either from someone who has a crush on you or to celebrate your single status on the day dedicated to love. When I eat a whole box of chocolates (or, you know, half a batch of cupcakes...), I usually find myself jonesing for something savory the next day. Oh, and nutritious. I really like to follow up sugar binges with vegetables, thereby creating a zero sum equation in my head (or some such logic).

Enter chard chips.

You've probably heard of kale chips (I feel like they're all the rage, at least around these parts). Our neighbor gifted us with four bunches of chard the other night when she stopped by to borrow a measuring cup and spoons for her daughter's birthday cake. Not really paying attention, I just assumed it was kale because she's given us bunches from her garden several times in the last few months.

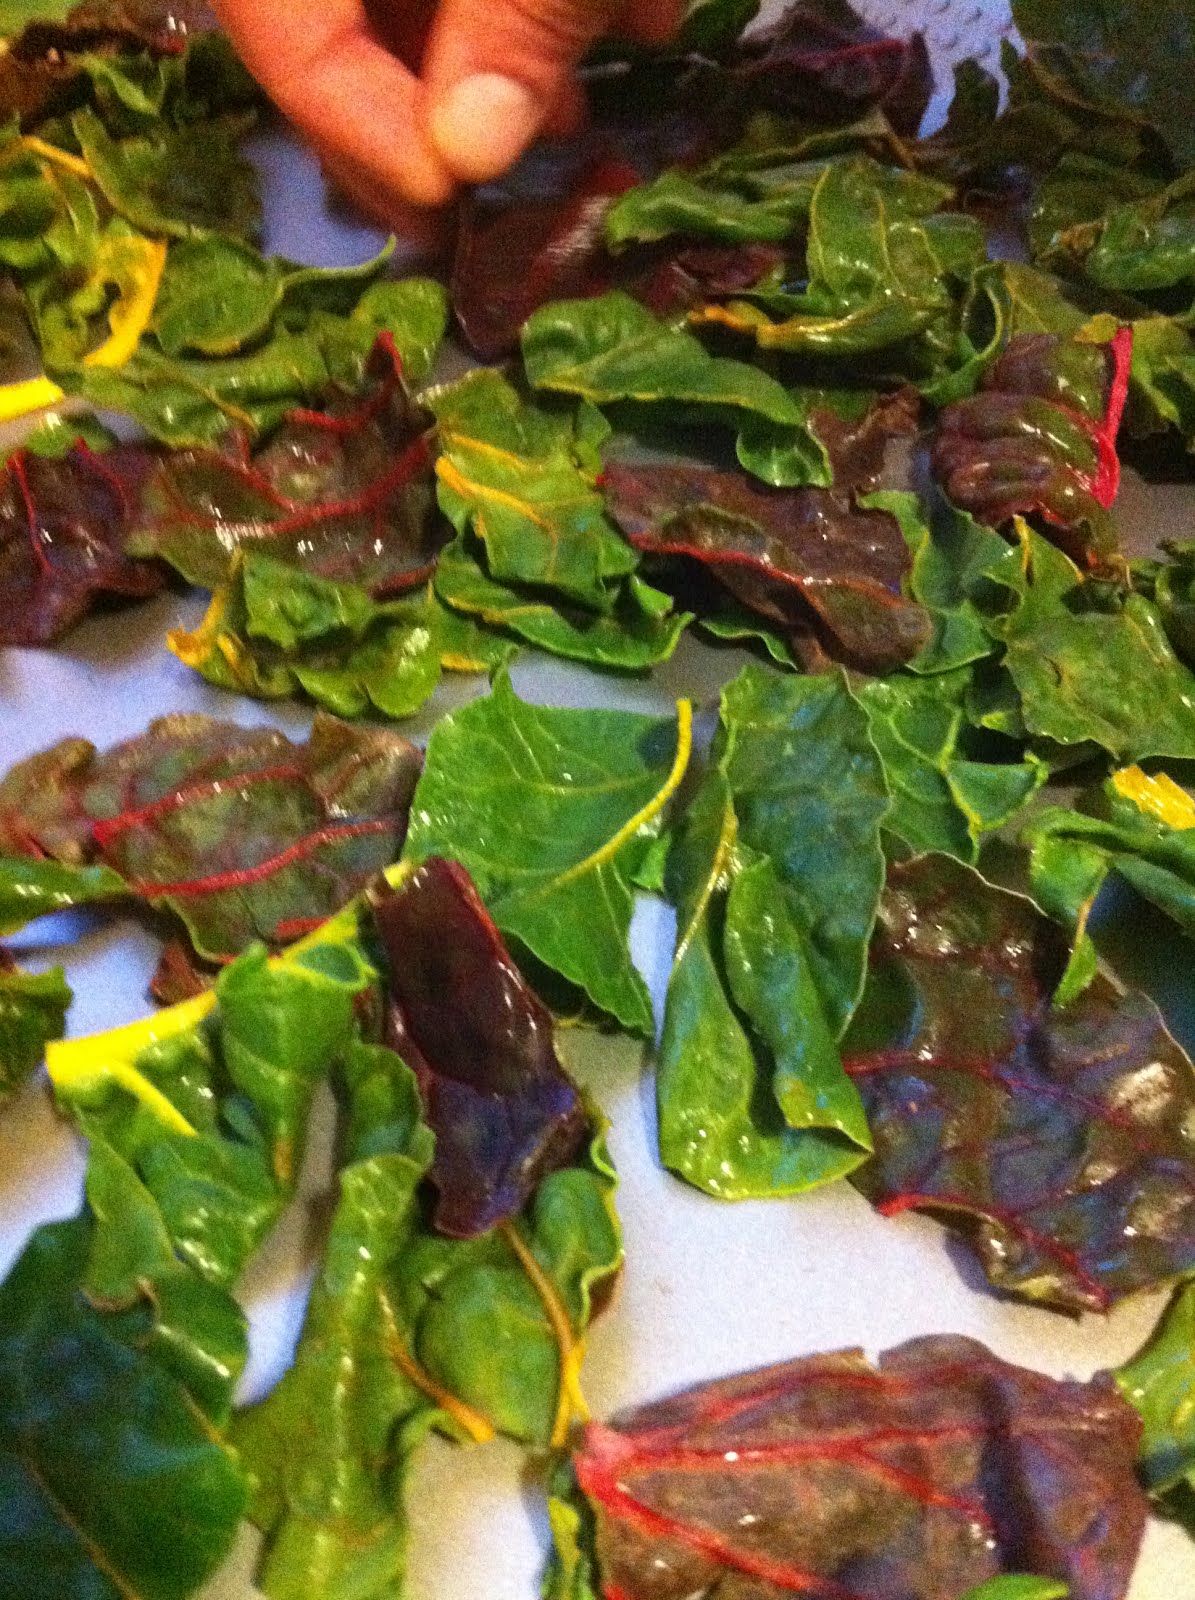
With 20 minutes to kill before our friend arrived to watch Max so we could go on a date, I washed the chard and then all three of us sat on the kitchen floor tearing it from its stalks into bite-sized pieces. Into the salad spinner it went until it was super dry and, from there, into a big bowl where I tossed it in olive oil and sea salt. John spread the chard on a baking sheet (at which point we both realized it was chard instead of kale...not sure why it took us so long since the two really do look pretty different from each other) and then put it into the oven at 350 degrees. Ten minutes later, when the edges had started to brown, we pulled it out.

Oh. My. God. Good.

Like, so good.

Like, pumpkin seeds on crack good (though, now that I've re-read that sentence, I'm pretty sure pumpkin seeds on crack is gross...but whatever, you follow).

And so easy! And so quick! And so good FOR you!

So grab a bunch of chard the next time you're at the market and whip up some chard chips. You'll be smiling and munching through your daily dose of vegetables.